This is a historical match up of 1066 English vs Normans using Field of Glory (3rd Edition)
The armies
were as follows, both armies are entirely undrilled troops and listed in order
of march:
The
English.
CiC field
commander with two subordinate troop commanders
2 units of
8 bases of poor quality fyrd, heavy foot, protected, offensive spearmen
4 bases of
light foot with javelin and light spear, average
4 LF
average sling
4 LF
average bow
8 good
quality fryd, HF armoured, average, offensive spear
8 good
quality fryd, HF protected, average, offensive spear
8 good
quality fryd, HF armoured, average, offensive spear
8 good
quality fryd, HF protected, average, offensive spear
8 Huscarls,
HF armoured, superior, heavy weapon
8 Huscarls,
HF armoured, superior, heavy weapon
8 Huscarls,
HF armoured, superior, heavy weapon
The Normans
CiC field
commander with two subordinate troop commanders
6 Foot
archers, LF, average, bow
6 Foot
archers, LF, average, bow
6
Crossbowmen, LF, average, crossbow
8 Spearmen,
HF, protected, average, defensive spearmen
8 Spearmen,
HF, protected, average, defensive spearmen
8 Spearmen,
HF, protected, average, defensive spearmen
8
Dismounted Milites, HF, armoured, average, offensive spearmen
8
Dismounted Milites, HF, armoured, average, offensive spearmen
4 Breton
Cavalry, Cavalry, protected, average, light spear, sword
4 Breton
Cavalry, Cavalry, protected, average, light spear, sword
4 Veteran
Milites, Knights, armoured, superior, Lancers, swordsmen
4 Veteran Milites,
Knights, armoured, superior, Lancers, swordsmen
4 Bodyguard
Milites, Knights, armoured, elite, Lancers, swordsmen
Army match up
Looking at
the differences between the armies, the English are a mass of heavy foot. Tough
head on but they’ll need terrain to secure their flanks and they’ll be slow to
react to enemy breakthroughs. The Normans have five mounted units, two agile Breton
cavalry and three hard hitting knights. They also have the advantage in light foot
– useful to pull the English out of line. However, they only have 5 units of
heavy foot to the English 9, so they’ll want to stretch the English out to get
an advantage
Deployment
The Normans
won the initiative roll and chose Agricultural terrain. The English chose the
compulsory open field and as much bad going as they could. The Normans got the
gentle hill and chose open spaces. The English managed to secure their left on
a vineyard, there’s an open field to their right. It’s really too wide a gap
between the two but they make the best of it with Huscarls in the centre and
fyrd on the flanks with the fyrd dregs in reserve.

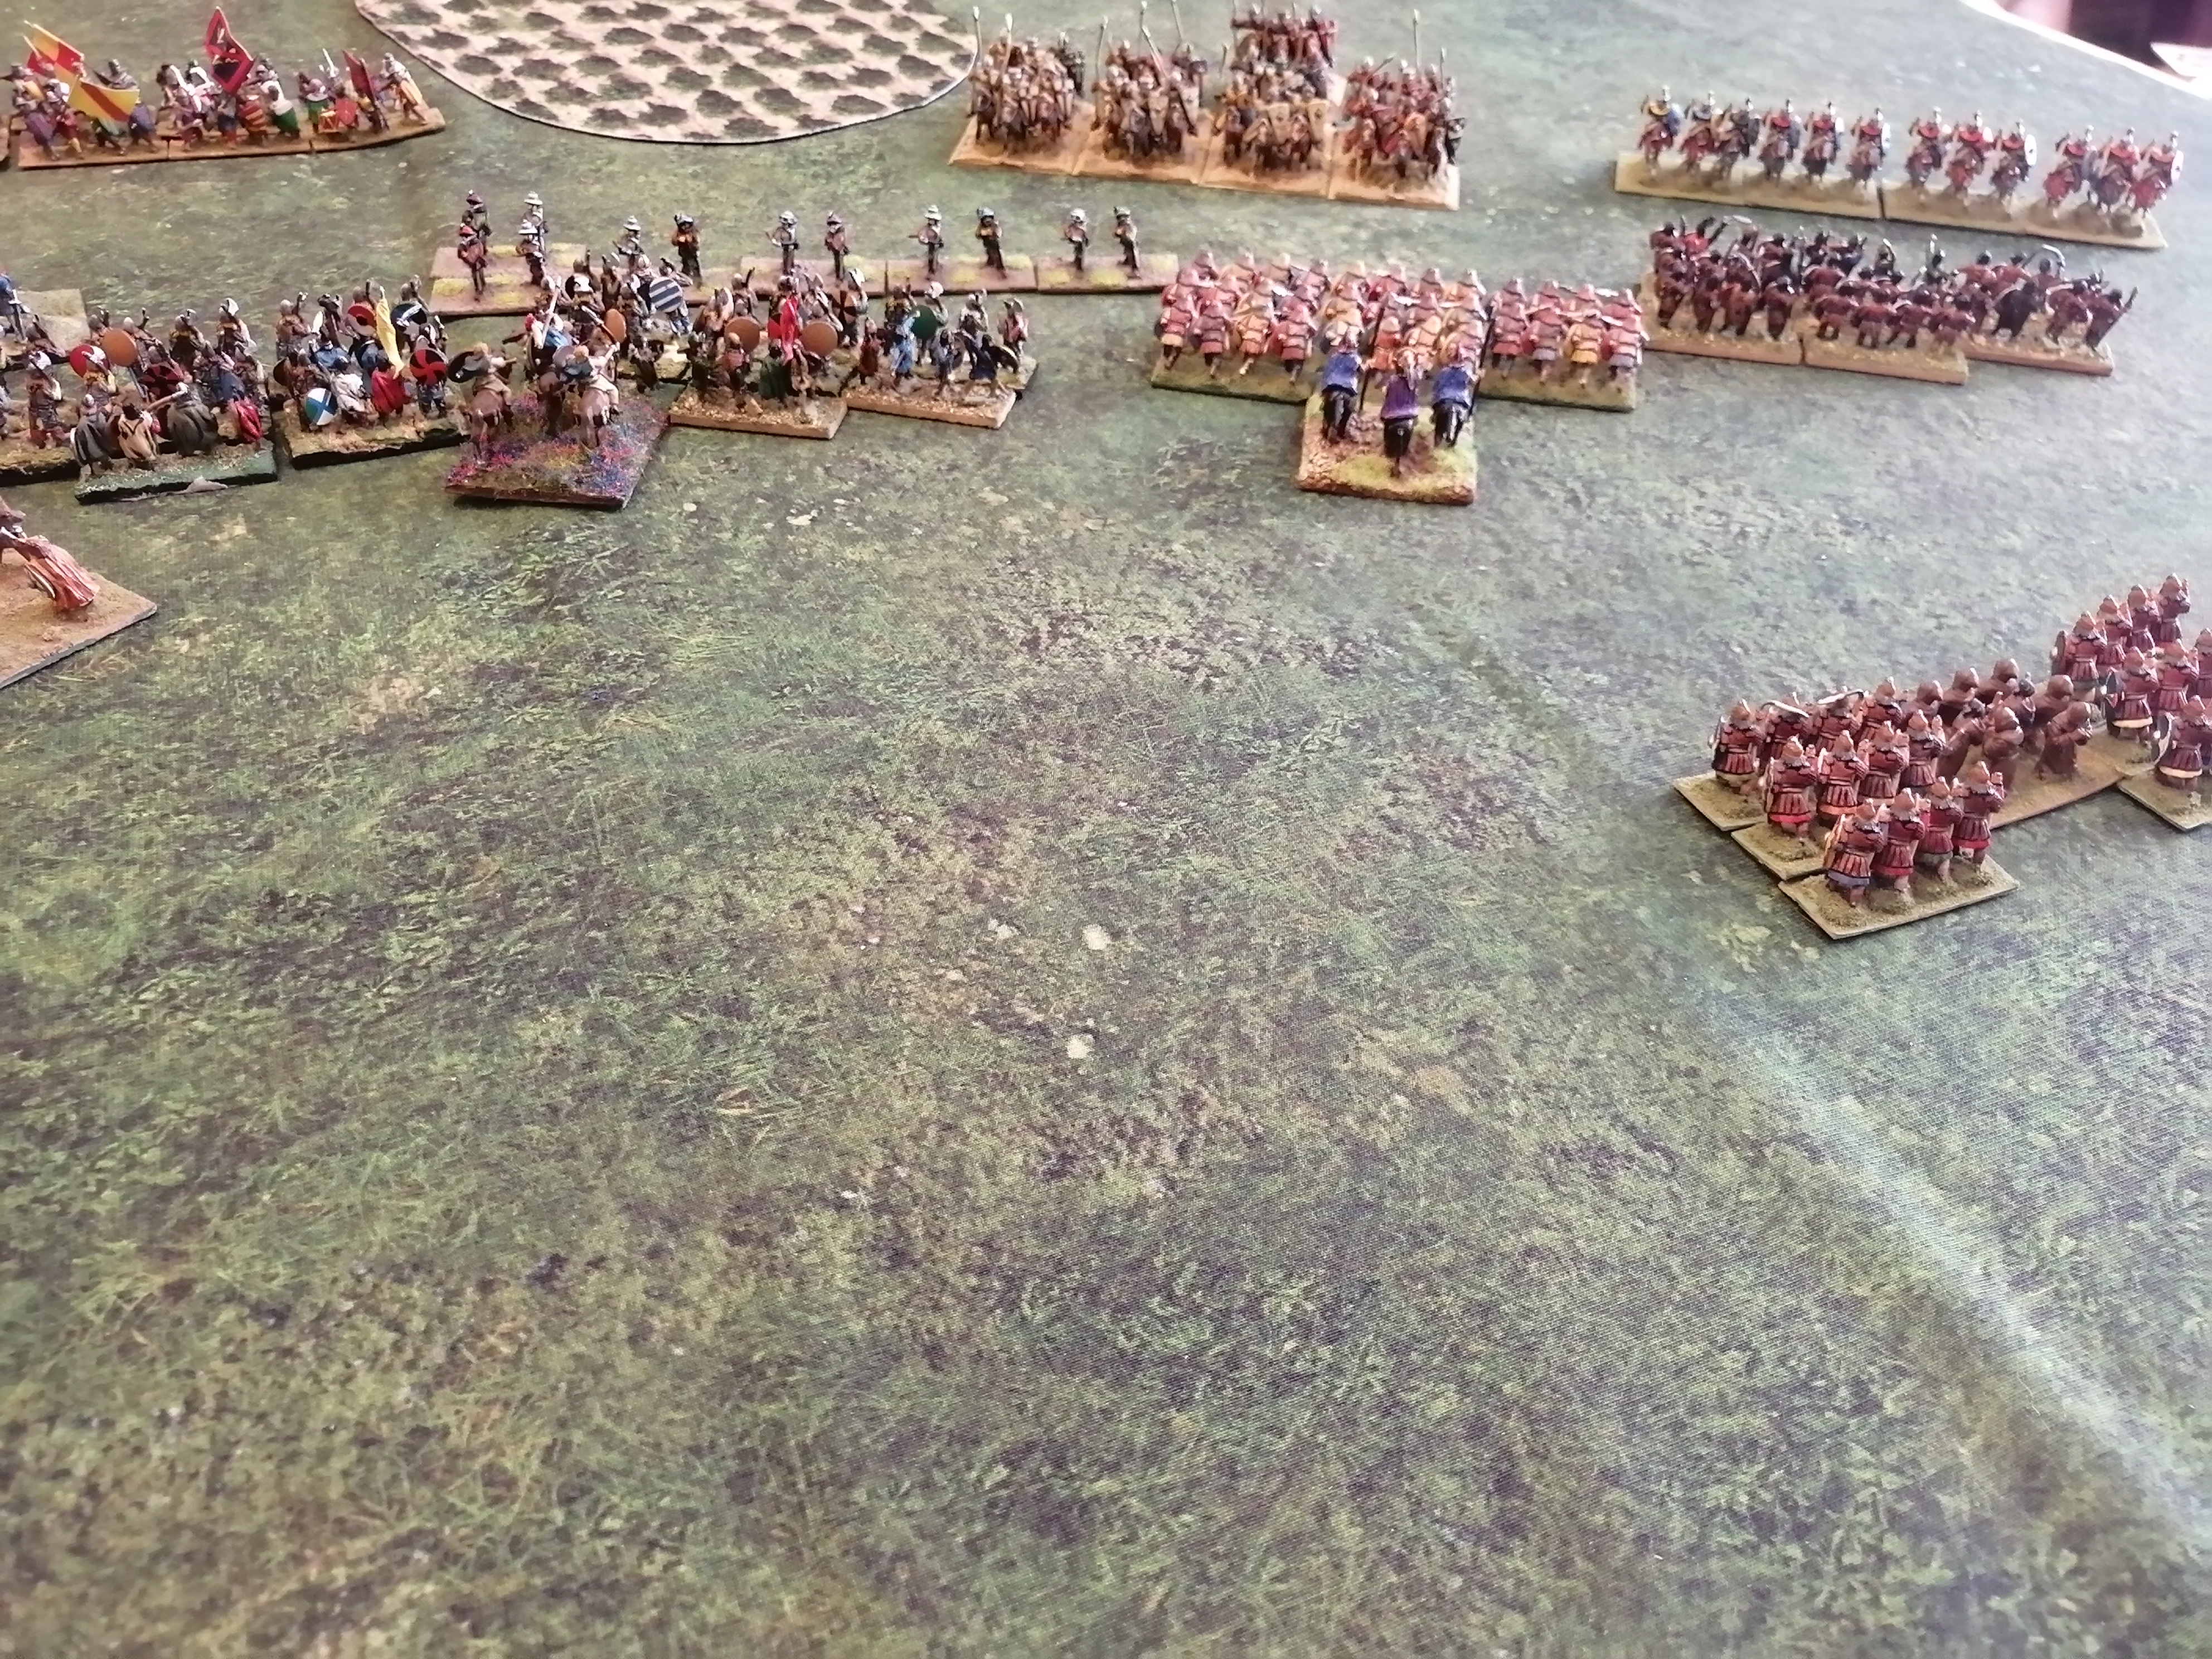
The Norman
centre and left. Foot Milites are in the centre held well back between terrain
and screened by light foot (out of shot). On their left, two units of Milites
are in reserve and a screen of light crossbowmen and Breton cavalry are thrown
forward.

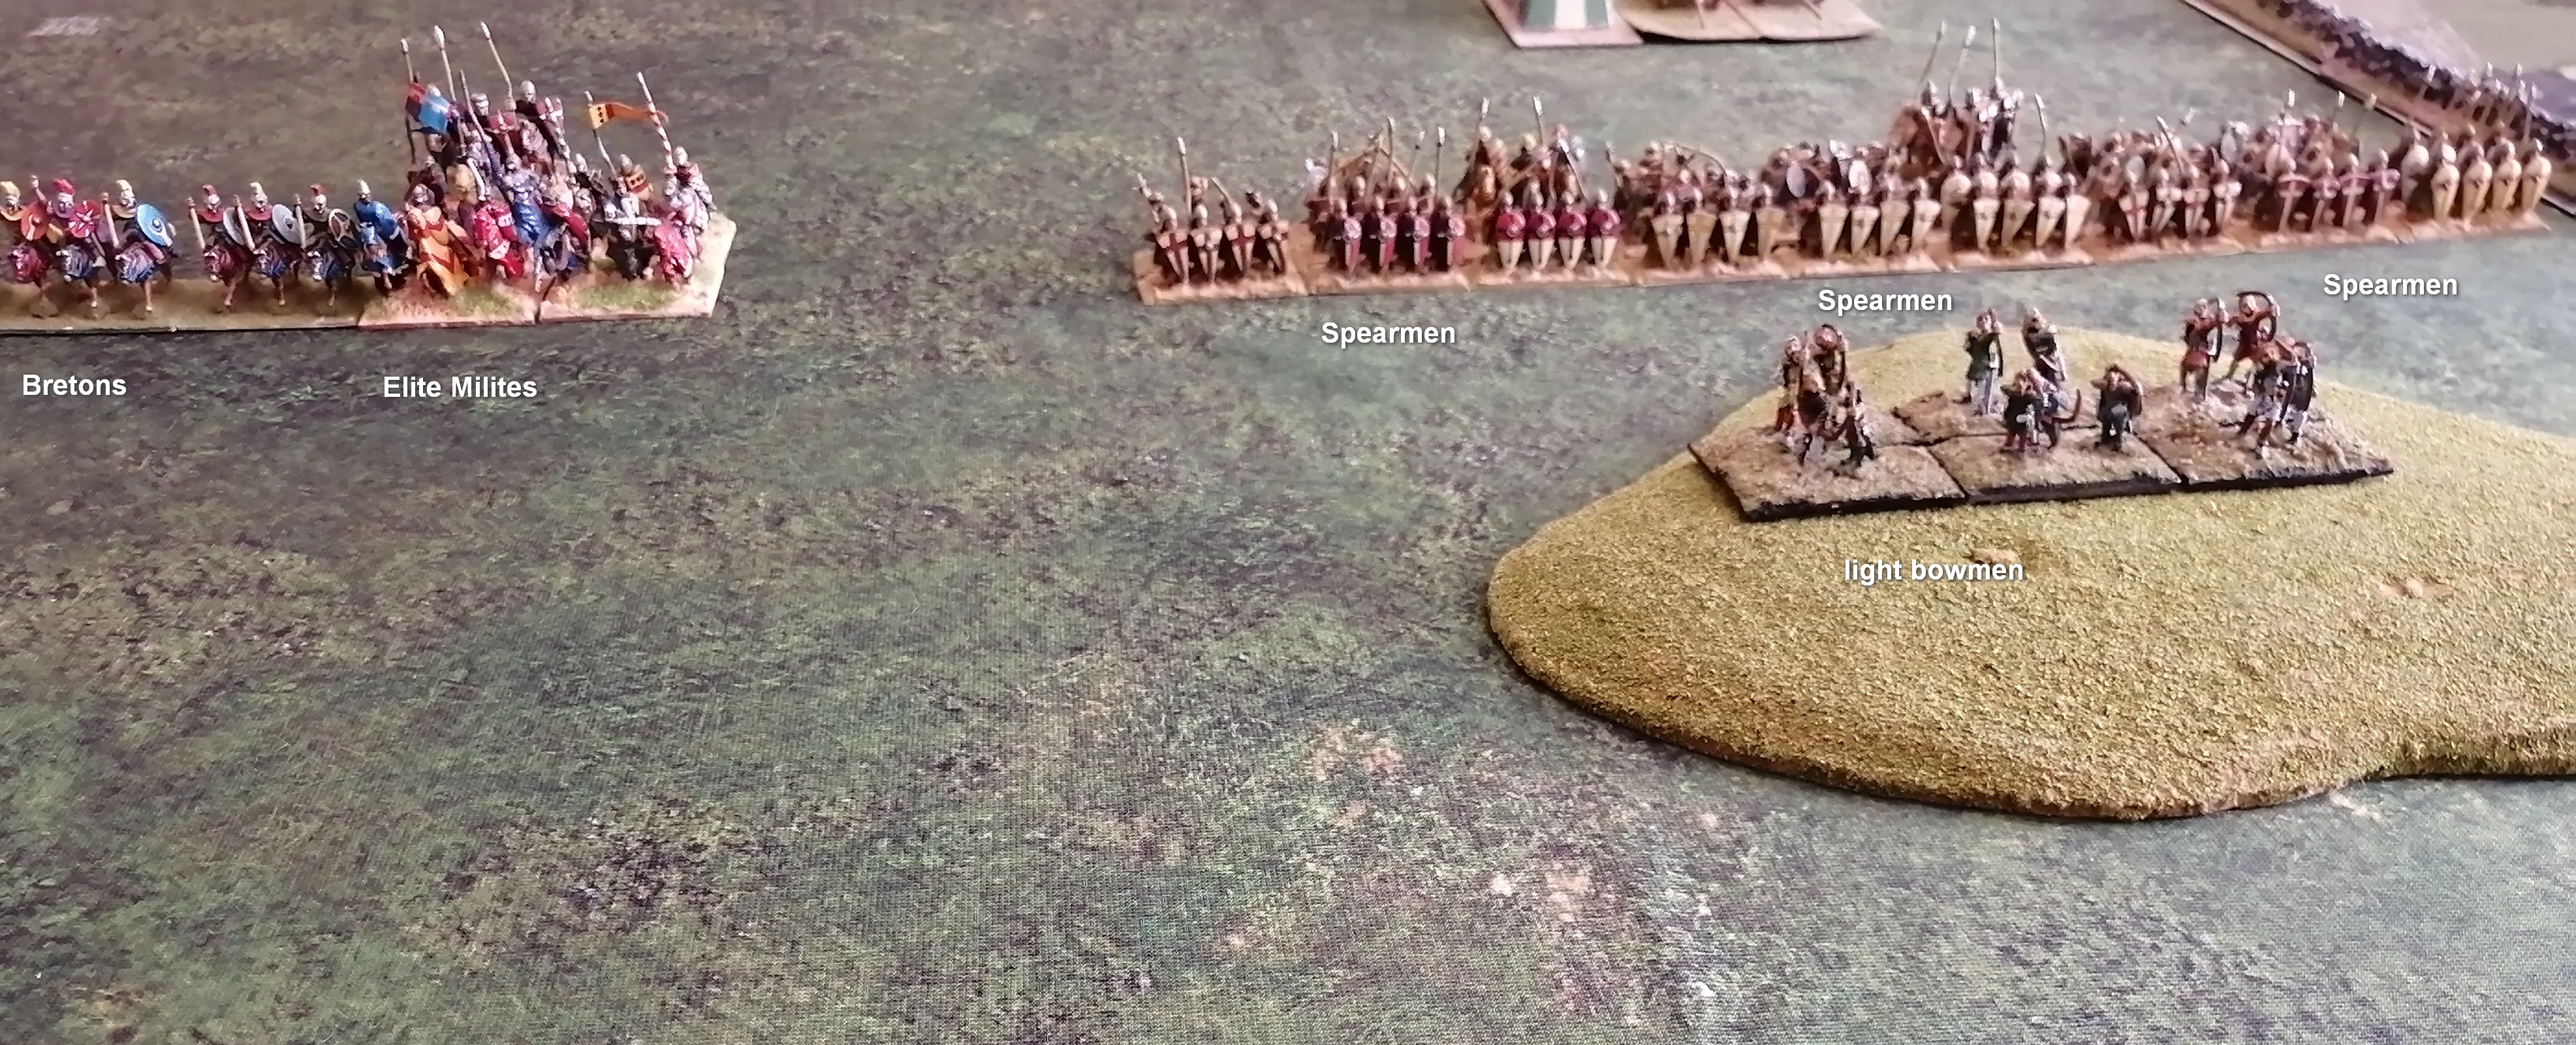
The Norman
right. The gentle hill has fallen very nicely for the Normans, and they’ll occupy
it with spearmen screened by LF Bow. Further out are the bodyguard Milites and
some Bretons. Facing this lot the English have just four bases of light foot
javelins.
Turn 1. The English
have fewer skirmishers than the Normans and more impetuous troops, so they
can’t really stay put. Besides, their right flank is in the air, so they push
forward along the line. The Norman crossbow LF on their left turn to support their
LF bow chums in the centre and the left wing Bretons advance to slow the
English.

On the Norman
right, they rush forward their spearmen to dominate the hill while the mounted
push forward.

Turn 2 and
the English continue to push forward with their centre and right while the
Normans attempt to driver in the English skirmish screen. The superior Milites edge
forward – not ready to commit yet but don’t want to be trapped in front of the
bad going.t of the bad going.

The English
left flank is having to wheel to the left to stop the Norman mounted getting
round them but they are losing touch with the Huscarls to their right. A unit
of the poor fryd from the reserve comes up to fill the gap.

Turn 3. With two units of Milites to deal with Harold orders the reserve fyrd to be brought up on the right in case of a breakthrough. They won’t last long against the Milites, but they might keep their attention for long enough.

Turn 4
In the
foreground the English LF retire to the safety of the vineyard under pressure
from the Norman combination of Breton horse and LF Bow. The LF are now able to
tempt the Fyrd to charge forward but they resist the urge, to the rear of the
fyrd the poor reserve is coming up to plug the gap. In the centre, the English
LF can make no headway against their Norman equivalents and retire. The
Huscarls move forward.

On the
Norman left the Breton cavalry withdraw having forced the English armoured fryd
to face them down. The Milites creep forward aiming for the protected fyrd and
the Huscarls.

Turn 5. The
sneaky Norman crossbows have expanded to tempt the fyrd but they pass their
test not to charge. The armoured fryd are driving back the Bretons. If the
milites don’t commit soon they’l be outflanked.
Turn 6. The
Huscarls charge to drive off the enemy skirmishers. The English generals join
the men about to be charged by the Norman Milites

The
superior Milites charge in. The Huscarls hold the charge and the Normans will
break off at the end of the bound. However the fyrd disrupt at impact, though they
survive the following melee.

On the
English left, the Norman spearmen have left the hill and the elite Milites have
moved forward to a position where the fyrd in front of them will still be
tempted to charge the LF, but if the fyrd charge too enthusiastically they’ll hit
the elite lancers. All the fyrd (including the poor ones!) are tempted to
charge.

Turn
7. The English general on the left tries
and fails to persuade the armoured spear not to charge. But they charge slowly
and thus don’t hit the milites. The two other fyrd units declare charges on the
Norman spear (better then testing not to charge and having one go in on it’s
own). The poor fyrd disrupt at impact but hold in the melee, the other combat
is a non event but the fyrd are now overlapped.

Not looking
too good on the other English flank either; the protected fryd become fragmented. However
the Huscarls have pinned the mounted Huscarls against the vineyard and the other two Huscarl units are now in
charge range of the dismounted Milites at last.

The dismounted Milites charge in against both Huscarl units. Next to them, the superior
mounted Milites try another charge against the third Huscarl unit. At the end
of the turn both dismounted Milites are disrupted, but the superior lancers
have disrupted their Huscarl opponents.

Turn 8.
It’s all kicking off on the English centre and right. One of the dismounted
Milites units has broken and their bow LF friends will eventually flee off table as a
result), but at the same time the superior lancers have broken the protected
fyrd. Worse, the other unit of lancers has driven their Huscarl opponents down
to fragmented and will break them shortly after.

On the
English left the armoured fyrd are now blocked by the elite knights, and the
other two fyrd units have lost bases and cohesion. Surprisingly, at the end of
this bound, the poor fyrd manage to rally to steady.

On the
right, the routing fyrd break through their poor countrymen and the milites pursue
in. Disrupted and poor, they rout at impact. The other mounted milites stop
pursuing the Huscarls and turn to face the flank of the next Huscarls in line.

On the English
left, the average protected fyrd have broken on base losses. The Norman
spearmen pursue keenly and hit the armoured fyrd. To help them out the elite
Milites charge as well. At top, the English general is now fighting in the
front rank of the poor fyrd, in a desperate (and doomed) attempt to take down a Norman unit.
The armoured fyrd seem happy to fight
two enemy units and the knights have to break off. The English have now lost 8
attrition points to the Norman 3.

Turn 9. On
the English left the poor fyrd break through base losses, but the armoured fyrd
keep on fighting. At 10 attrition points the English are on the brink of
defeat.

The English
Huscarls finish off the dismounted Milites. Unfortunately they don’t pursue
far enough and get caught in flank by the lancers, who fragment them in the melee. and that’s the end of the
English army.The English are broken and the Normans have lost 5 attrition points.

Well done Graham, nice report. I like your description of Wargaming. I could have done with this the other day, when I tried to explain what we do to my son's partner. I think she was more confused after I had finished. I look forward to your next blog.
ReplyDeleteMy comment did not leave my name? R
ReplyDeleteSteve
Steve, you need to set up a profile.
DeleteGreat report - what's next? Maybe your Aztecs could grace the Field of Glory!!!
ReplyDeleteAnother thought is a re-fight of Hattin? Some great characters on both sides and of course the great Saladin!
ReplyDeleteHave been crawling a bit further, see if it works?
ReplyDeleteYes that works!
Delete